Friday, November 30, 2012

'Twas the Night Before December...

9:04 PM 1 Comments
...and all through this house, I've been scrambling to put the finishing touches on our brand new advent calendar. I've been meaning to make one for a few years now, and I've had heaps of fun scouring the Internet for ideas. I wanted something that we could use year after year but that we could change up a bit, and I also wanted something that would allow me to include advent activities along with treats. I loved this project on makoodle, and I've spent the last few weeks gathering the materials I would need to make it work. It did.


The step by step directions provided on the blog are quite good; I'll add a few tips for those of you who might be interested in taking this on:

  • I used the free printable advent calendar numbers provided on makoodle
  • The biggest expense was the party favor tins. They cost $20 for a set of 30 at Michaels. I used a coupon to save a bit on that.
  • The 2" squeeze punch may just be my new favorite thing. I used it to cut the numbers (which were modpodged in) and the activities (which were taped in so we can change them each year).
  • The biggest challenge for me was tracking down a magnetic square to hold the tins. I finally found what I needed on my third visit to Michael's. It's a 11.5 x 11.5 inch magnetic dry erase board. I loved the bright lime color so I skipped the directions about covering the magnetic surface with a decorative piece of scrapbooking paper. I also skipped the frame.
  • The directions do not mention the need to put magnets on the back of the tins. You will need a roll of adhesive magnetic tape. Stick a 1" strip on the back of each tin.
  • Sean and I had a lot of fun coming up with twenty-five advent activities to include in the tins. I wasn't able to use the free download for this part of the project because it is a PDF document and not editable (and I just don't think we'll be seeing the Christmas lights at Salt Lake Temple this year). So I made my own using Microsoft Word. You are welcome to download and customize them for your own use.
  • Each tin houses two Kisses. If your children are anything like mine, make sure they are the same color each day...

I'm super happy with how this turned out and, thanks to my procrastination efforts, I don't have to wait long to see my kids' excitement either. Tomorrow begins Christmas at our house (Activity #1 - cut down the Christmas tree). Here's wishing a happy start for all of you!


Thursday, November 15, 2012

Halloween Recap: Thing 1 and Thing 2

6:11 AM 0 Comments
Be still this librarian mama's heart -- my boys dressed as Thing 1 and Thing 2 for Halloween. Do you remember Thing 1 and Thing 2? They are friends of the Cat in the Hat and make a late entrance in the book to wreak further havoc on the home. They are spirited and silly and they like to pretend they are completely innocent even as they are tearing up the joint...in short, the costumes were perfect for my pair.

We bought red union suits off of Amazon. They were $16 a piece and because I did not permanently attach the logos (see below), the boys can wear them through the winter. And yes, they do have a drop in the back. They are ridiculously adorable and I'm sure they'll show up in a holiday photo shoot or two.

I found the template for the logos on this blog. While my boys don't look nearly as sassy as these sisters, the templates were exactly what I needed. I printed them on fabric paper that you can run through an inkjet printer then cut them to size and whip-stitched them onto the front of the union suits. This made it a bit tricky squeezing the boys into the suits without being able to unbutton them all the way, but we figured it out. After Halloween, I pulled out the stitching, and the suits are as good as new.

The thing I am most proud of are the wigs:


Instead of purchasing blue wigs from the party store (which ran about $20 a piece), I wrapped blue feather boas (which I purchased from Jo-Anns) around old stocking caps and attached them with a hot glue gun. I particularly love how much height the wigs have with this process; Emmett in particular looks like a toddler version of Marge Simpson. As a bonus, the boys had warm hats for trick-or-treating. We'll be living with remnants of blue fuzz for the next few months, but that's okay.

And so, I leave you with memorable words of Theodore Seuss Geisel, who wrote:

"It is fun to have fun
But you have to know how."

These little guys certainly do.


Monday, November 12, 2012

A Change in the Weather: Creamy Tomato Soup

5:30 AM 0 Comments
Eeee, gads...I can't believe it has been an entire month since I've posted. There are several draft posts that just didn't get finished, and an ever growing list of things I want to post about...but alas, time moves quickly in this new chapter for our family. I have definitely been cooking a lot less (our new motto is "We can't be out of food, we still have eggs") but in many ways enjoying the cooking I do a whole lot more.

Anyway, enough of that. I'm back with a delicious slow cooker recipe for creamy tomato soup. The temperature outside literally dropped forty degrees between Saturday and today; we were doing yard work in short sleeves then, and it is now hovering right around freezing. When I made my grocery list last week and asked Finn if there was anything he wanted me to make, he replied, "Homemade soup and homemade bread." He got his wish for Sunday dinner (and, before we started to eat, reminded us to thank him for the great idea...), and I'm happy to share this with you today. It is a family favorite. I highly recommend throwing down the extra change for good quality canned tomatoes; I love the Muir Glen Fire Roasted Crushed Tomatoes.

I'll be back soon with a fantastic advent calendar I've been working on as well as a few retrospective Halloween costume details. Thanks, as always, for reading!

Creamy Tomato Soup
From More Make It Fast, Cook It Slow

PRINT ME!

NOTE: This serves 4-6. My family of 4 ate almost all of it for dinner. If you want leftovers, it doubles beautifully.

2 14 oz. cans crushed tomatoes
1 onion, peeled and chopped
1 cup broth (the recipe calls for beef, I used vegetarian)
1/4 cup brown sugar
2 tsp. dried basil
1 tbsp. Worcestershire sauce
1 tsp. unsweetened cocoa powder
1 14 oz. can evaporated milk (to add later)
2 tbsp.  butter (to add later)

In a blender or food processor, puree tomatoes and onions then add to slow cooker OR if you have an immersion blender, do it right in the slow cooker.

Add broth, brown sugar, basil, Worcestershire, and cocoa powder. Stir. Cover and cook on low for 6 hours or on high for 3 to 4. Stir in the milk and butter at the end. Cover and cook on high for fifteen minutes or until the butter melts and the soup is hot.

Enjoy!


Friday, October 12, 2012

Cupcakes for Breakfast

9:21 AM 0 Comments
t-shirt applique directions here
In lieu of a birthday party, Finn chose a family getaway for his fifth birthday celebration. We decided on Indianapolis and made plans to hit the Indianapolis Children's Museum and Caribbean Cove Water Park, with the added bonus of an amazing parent-selected dinner at Trader's Point Creamery...more on that later.

But what to do about a cake? I couldn't very well not make my kid a birthday cake, but without a party in the works, it kind of fell to the wayside. Throw in the timing (we left for Indy early on Saturday, which was his actual birthday) and it didn't really make sense to knock myself out. The solution? Cupcakes for breakfast.

To be perfectly honest, it was actually a muffin recipe. But once you add cream cheese frosting to a dense, sweet muffin, there isn't really that much of a difference.These were sooooo good, and super easy; we'll definitely be making them again this fall.

Happy birthday, Finn. You truly light up my life.


Pumpkin "Cupcakes" with Cream Cheese Frosting
Adapted from here and here

Makes 12

PRINT ME!

1 1/2 cups white flour
2 tsp. baking powder
1/2 tsp. baking soda
1/2 tsp. salt
1 tsp. cinnamon
1/2 tsp. nutmeg
6 Tbsp. butter, melted
3/4 cup brown sugar
1 cup canned pumpkin puree (not pie filling)
1 large egg
1/4 cup milk
1 tsp. vanilla
  1. Preheat oven to 400 degrees. Line a muffin tin with cupcake wrappers or grease the cups.
  2. Place the first six ingredients in a bowl and whisk to combine.
  3. In a separate bowl, whisk the remaining ingredients.
  4. Add the dry ingredients to the wet ingredients. Stir until just combined. 
  5. Pour into prepared muffin tin, 3/4 full.
  6. Bake for 20 minutes.
  7. Cool, frost and serve!
Frosting
1 8 oz package cream cheese, softened
1/2 cup butter, softened
1 cup powdered sugar
1/2 tsp. vanilla

Combine all ingredients and beat until fluffy, 1-2 minutes.


Monday, October 1, 2012

Weekday Winner: Artichoke, Potato and Portobello Mushroom Casserole

5:02 PM 1 Comments
I'm trying so hard to like mushrooms, really I am; everyone else in my family loves them, and they are in many instances a logical meat alternative. I really liked this casserole, which includes mushrooms, so perhaps I'm getting better. This isn't a super fast dish, but once you have the casserole assembled it is pretty much hands-off, so I count it as a quick weeknight meal.

I served this as a main dish with a salad for dinner. It was even tastier a few nights later as a side dish with scrambled eggs. The original recipe (which comes from Bon Appetit) calls for fresh artichokes, but I used canned to make it quicker and easier. I used the slicing side of my box grater to slice the potatoes super thin; they turned out crispy and oh-so-delicious. And I love a recipe that calls for 1/2 cup of white wine, as you are certain to have some leftover to enjoy with dinner...

Enjoy!


Artichoke, Potato and Portobello Mushroom Casserole
Serves 8

PRINT ME!

4 tbsp. olive oil
2 cans quartered artichoke hearts, sliced
2 pounds Yukon Gold potatoes, very thinly sliced
4 large portobello mushroom caps, thinly sliced
6 oz. fresh goat cheese
3 garlic cloves, minced
3 tbsp. freshly grated Parmesan
1/2 cup dry white wine

Preheat oven to 425 degrees. Brush 9x13 glass baking dish with 1 tbsp. oil.

Arrange half of potatoes in dish, covering bottom completely. Top with half of artichoke hearts and half of mushrooms. Coarsely crumble half of goat cheese and sprinkle over artichokes and mushrooms. Sprinkle with salt, pepper, and half of garlic, then 1 tbsp. Parmesan. Drizzle with 1 tbsp. oil.

Cover with remaining mushrooms, then artichoke hearts, goat cheese, garlic, 1 tbsp. Parmesan and 1 tbsp. oil.  Top with remaining potatoes. Pour wine over; drizzle with remaining oil.

Cover dish with foil. Bake 40 minutes. Reduce oven temperature to 400 degrees. Sprinkle top with remaining Parmesan. Bake uncovered until potatoes are tender and top is brown, about 25 minutes. Cool slightly and serve.


Sunday, September 30, 2012

Almost October Sunday

3:54 PM 0 Comments
Yesterday we made the obligatory visit to our local apple orchard to find out just "How Tall This Fall" our kids are, to take a wagon ride behind a big green tractor, and to stock up on apple cider donuts, a treat of which I honestly cannot get enough. Sadly, the U-Pick portion of the orchard was not available, but that didn't stop us from buying a peck of apples in the store that someone else picked.


I woke up this morning with applesauce on my mind. I used Stephanie O'Dea's crock pot recipe, in part because I didn't much feel like being tied to the house on this beautiful day. The only thing wrong with this recipe is that it just doesn't make enough - I tripled it, and I still only got about a quart of applesauce. Fortunately, it's easy enough to repeat as needed. I hope you enjoy it.

The rest of the apples went to a German Apple Pie, which we will enjoy on this eve of October. Finn and I made some seasonal decorations for the windows, and there are vegetables roasting in the oven for dinner. Oh fall, how I love thee.


Slow Cooker Applesauce
Adapted from crockpot365.com

4 large apples, peeled, cored and cut into quarters
1 tsp. lemon juice
1/2 tsp. cinnamon
1 tsp. vanilla
1 T. brown sugar
1/4 cup water

Place the quartered apples into the crock pot. Sprinkle with remaining ingredients. Cover and cook on low 4-6 hours. When the apples are super tender, mash with a potato masher or fork.

* Note: I tripled the recipe with no ill effect. I let mine cook the full 6 hours and then left it to cool for an hour before stirring it up.


Monday, September 17, 2012

Weekday Winner: West African Groundnut Stew

4:35 PM 0 Comments
Oh my goodness, this was a huge winner all around...sooooo delicious. It has a lot of the same flavors as our favorite peanut sauce, but with the yummy textural addition of sweet potato and chard. I served it over quinoa with roasted plantains on the side. I had never thought of roasting plantains - I typically fry them - but they turned out super good and were so much less messy and hands-off to prepare. In this household, things that cook at high heat in the fully enclosed oven are much more easily prepared than those cooked on the stovetop, particularly if there is splashing oil involved. I roasted them at 450 for about 20-25 minutes, flipping once about halfway through.

As with so many savory dishes, this tasted even better the next day. Make a big batch and enjoy, enjoy, enjoy!

Mmmmmm.

Roasted plantains

You put it all together...

West African Groundnut Stew
Adapted from Vegetarian Soup Cuisine

PRINT ME!

1 tbsp canola oil
1 medium onion, diced
1 red pepper, seeded and diced
2 cloves garlic, minced
1 tsp. ground ginger
1 serrano chile, seeded and minced
2 cups water
2 cups tomato juice
1 14 oz can stewed tomatoes
1 medium sweet potato, peeled and diced (2 cups)
1 tbsp dried parsley
1 1/2 tsp. thyme
1 1/2 tsp. cumin
1/2 tsp. salt
1/2 cup chunky peanut butter, preferably natural
2 cups chopped Swiss chard

In a large saucepan, heat the oil. Add the onion, pepper, garlic, ginger, and chile and saute 4 to 5 minutes. Stir in the water, tomato juice, stewed tomatoes, sweet potato, and seasonings and cook for 25 minutes over medium-low heat, stirring occasionally, until the potato is tender.

Aggressively stir in the peanut butter. Stir in the chard and return to a gentle simmer, stirring frequently. Remove the stew from heat and let stand for 5 to 10 minutes.

Ladle into bowls and serve with couscous or rice and roasted plantains.


Thursday, September 13, 2012

Baked Tofu

8:10 PM 5 Comments
My family can't get enough of this baked tofu; we snack on it after school, bring it for lunches, take it on picnics, stick it in sandwiches or in salads. The marinade is actually adapted from one that I found in a seafood cookbook and is intended for fish, but it works beautifully for this recipe. For my local readers, this reminds me a lot of the marinaded tofu at Strawberry Fields, which I have always loved, and, like their tofu, it works equally well straight up or on a sandwich. The flavor and texture deepen the longer that you bake it, and the resulting strips are positively addicting.

I use the really grainy, dense organic tofu that is available at our co-op, but this also works with standard grocery store fare. When I use the denser tofu, I don't think it is necessary to press it, but I always press the vacuum packed variety.

To make it a dinner, I cooked up some frozen shelled edamame and prepared soba noodles that I served cold with a noodle base (I like the Shirakiku Soba Noodle Soup Base, which I get at the Asian market). So pretty, so fresh, and so satisfying!

Enjoy!


Baked Tofu

PRINT ME!

For marinade:
3 cloves garlic, minced
3/4 cup soy sauce
1/2 cup brown sugar
1 tsp. ground ginger
1 tsp. lemon juice

1 16 oz block extra firm tofu

Drain and rinse the tofu. Place it on a plate and cover with paper towels. Put another plate on top then weigh it down with something heavy (I typically use a big ol' cookbook). Let sit ~20 minutes. You can skip this step if you are short on time.

Slice the tofu into 1/2 inch slices. Place in a shallow baking pan and cover with marinade. Let sit in marinade for 20-30 minutes, flipping every ten minutes or so. The longer it sits, the more flavorful the tofu will be.

Preheat the oven to 350 degrees. Temporarily transfer the tofu to a plate. Rinse and wipe out the baking pan and cover it with foil and cooking spray. Move the marinaded tofu slices bake onto the baking pan.  Bake the tofu slices for 30-40 minutes, flipping every ten minutes. The longer you bake it, the chewier it will be. This is good warm, cold, or at room temperature.


Friday, September 7, 2012

Weekday Winner: Garden Gazpacho

8:10 PM 1 Comments
I'm rolling out a new feature on this here blog. My world is suddenly structured in a way it hasn't been in a while, so I think it would be advantageous to throw in some structure to my blogging efforts as well. That said, I present to you the inaugural Weekday Winner posting!

Here's the idea:
  • Every week I cook three or four dinners I haven't cooked before. This isn't changing because I've gone back to work. If anything, cooking has once again become my beloved, much anticipated, end-of-the-day hobby, and I'll be eager to try new things.
  • At the end of every week, I'll share my family's favorite from the week before. 
  • If you play along with me, you'll have a whole arsenal of weeknight meals at your disposal. Doesn't that sound great?

I'll say upfront that most of these will be vegetarian, since that is pretty much how we are eating these days. Most of these will be fairly kid friendly (though my kids are more adventurous than some). Most of these will be fairly easy on the budget. Most of them will take thirty minutes or less to prepare. And all of them -- I promise -- have been tested and tasted and passed the rigorous weekday winner criteria.

So...to start off the weekend, a DELICIOUS recipe for garden gazpacho that is just the thing to have in hand before heading to your Saturday morning farmer's market. I served this on my fancy soup and sandwich platters with open face egg salad sandwiches on the side...super yummy all around.

Enjoy!


Garden Gazpacho
Adapted from Vegetarian Soup Cuisine

PRINT ME!

2 large ripe tomatoes, diced
1 small red onion, diced
1 medium red bell pepper, seeded and diced
1 medium cucumber, peeled and diced
2 cloves garlic, minced
1 small serrano pepper, seeded and minced (optional)
1/4 cup chopped fresh parsley
salt and pepper to taste
2 cups canned tomato juice
Tabasco to taste

Combine all ingredients in a large mixing bowl and blend thoroughly. Transfer about three-quarters of the mixture to a blender or food processor; process for five seconds. Return the pureed mixture to the mixing bowl. Alternately, use an immersion blender in the original bowl, being careful to leave some chunks. Refrigerate for at least two hours. Serve in chilled bowls garnished with fresh parsley. 


Saturday, September 1, 2012

Blog? What blog?

7:49 AM 0 Comments
I can't believe it has been almost a month since I last posted. On second thought, I can totally believe it - I can hardly catch my breath around here, let alone compose my thoughts in writing. It has been a whirlwind, but we are slowly figuring things out.

I'll take a moment here to summarize a few things we've been up, and then maybe, just maybe, I can try to get back on track. I have been cooking, and even crafting a bit, and I occasionally remember to snap a photo or two...so I'd love to share some of that with you. Since the original intent of this blog was to prove that you can be a busy mama and still have hobbies, I have to prove myself right, after all.

  • I'm knitting a few coasters for Sean's office...a super easy, super mindless knitting project that gives me some much needed meditative needle time to wind down at the end of the night. I love Cascade 100% Highland Wool - it's not too fancy (these are coasters after all) and it felts beautifully.

  • We're on a whole grains, produce heavy cooking kick. Eating tons of roasted vegetables. Last week we roasted a huge batch then used them for paninis and pizza throughout the week.

  • Finn wants a blanket to bring to school for naptime. Apparently the one he has been using is "too small," so we'll probably spend some time this weekend working on that. School is going really well for the boys...and they are super cute trotting out every morning in their backpacks. I sure miss them, though.


  • I'm not home much, but when I am, I'm cooking and baking as much as I can. Made a few loaves of multigrain bread to get us through the week. Made a few batches of yogurt. And we are enjoying big weekend breakfasts...more on that to come.

  • Have plans to make an apron that I can wear at work. In part because, frankly, I miss wearing an apron. And in part because there are parts of my work that are just plain dusty, so it'd be nice to have one on hand. Hoping to try the grownup version of this pattern with some kind of wacky librarian print. 

So there you have it. I'm secretly grateful for this rainy, rainy Saturday, and grateful for three days in my little house with my boys.


Here's wishing you all a lovely weekend.


    Tuesday, August 7, 2012

    Muffins for the Mornings

    10:48 PM 2 Comments
    So, after two and a half years as a full time stay at home mom, I am going back to being a full time school librarian. I could say a dozen things on either side of the emotional scale; needless to say, it's a huge transition for my family and me, and one that feels somewhat bittersweet.

    On the practical side of things, there are all kinds of looming logistics that stand before me. In less than two weeks' time, Sean and I will have the daunting task of getting ourselves and our boys up and out the door in the wee hours of the morning. On the plus side, the boys will eat breakfast at day care, so that's one less morning task to face (and one less mess to make). However, I've still got to eat. I am a huge advocate of breakfast, but I can all too easily see myself grabbing my coffee and a granola bar as I race to the minivan with a kid on the hip and another trailing behind ve-e-e-e-ery slowly. With that in mind, I noticed a couple of extra ripe bananas on the counter today and came up with this recipe for banana muffins in the hopes of filling a freezer bag with quick, wholesome morning treats for full-time-working-me. They are fairly healthy, not too sweet, super fluffy, and just the right size for starting the day.

    Wish me luck.


    Breakfast Banana Muffins
    Adapted from allrecipes.com
    Makes 24 mini muffins

    PRINT ME!
    • 1 cup white flour
    • 1 cup whole wheat flour
    •  2 tablespoons baking powder
    • 1 teaspoon baking soda
    • 1/2 teaspoon salt
    • 2/3 cup oatmeal
    • 2 mashed ripe bananas
    • 1/2 cup white sugar
    • 1 teaspoon vanilla extract
    • 2 eggs 
    • 1/2 cup plain yogurt
    1. Preheat oven to 350 degrees F. Grease muffin cups or line with paper muffin liners.
    2. Mix together flours, baking powder, baking soda, salt, and oatmeal. 
    3. In a separate bowl, beat together banana, sugar, egg and vanilla. Stir in the yogurt. Combine banana mixture and flour mixture until just combined. Scoop batter into prepared muffin cups.
    4. Bake in preheated oven for 12 to 15 minutes, or until a toothpick inserted into center of a muffin comes out clean. Let cool before serving. For best flavor, place in an airtight container or bag overnight.

    Tuesday, July 24, 2012

    Montana Brews and Homemade Ketchup

    3:03 PM 1 Comments
    The morning before we left Montana, I ran to the grocery store and bought sixty bottles of assorted Montana beers that you can't get in Illinois (lucky for me, it was 8:03 when I checked out, as you can't buy alcohol before 8 am...). There was ample room in the minivan to transport our goods, so the bottles traveled with us from Montana to Wyoming, Colorado, New Mexico (where we left a few), then back northeast through Oklahoma, Kansas and Missouri. This previous weekend we invited a few neighbors over for a Montana-themed happy hour to share our bounty:


    Because we like a theme, Sean and I also made a few appetizers with Montana-y flavors. I found smoked trout at our local grocery store, which we served with crackers. I baked up this incredible brie in puff pastry using huckleberry jam and huckleberry syrup we brought home with us. And Sean grilled up mini buffalo burgers that we served on slider buns with homemade ketchup on the side. The homemade ketchup was a last-minute addition to the menu; we often watch videos on the chow.com channel on our Roku streaming device, and it was something they featured. It's delicious - not quite as smooth as bottled ketchup, but spicy and rich and oh so good. The recipe calls for canned tomatoes, but this would be a great one to file away for late summer when you've got lots of juicy ripe tomatoes in the garden (be sure to peel them first in that case).

    Hope you enjoy it!

    Party favors
    From left: baked brie, buffalo sliders, smoked trout
    Homemade ketchup

    Homemade Ketchup
    Adapted from chow.com


    *** NOTE: This makes a lot of ketchup. I halved it and still had plenty left over. The original recipe says that it lasts 3-4 weeks in the fridge.

    • 2 28oz cans of pureed tomatoes
    • 1 1/2 cups onions, minced or grated (I pureed in the blender)
    • 2 Tbsp yellow mustard
    • 1/4 cup light brown sugar
    • 1/2 cup white vinegar
    • 1/2 tsp ground allspice
    • 2 Tbsp dry mustard
    • 1 tsp salt
    • 1 tsp ground black pepper
    • 1 tsp celery seed (I used 1/2 tsp of celery salt)
    • 2 tsp garlic powder
    1. Add all the ingredients to a large pot and mix well. Heat over medium until boiling. Reduce heat to low and simmer for at least two hours or until desired consistency is obtained.
    2. Remove from heat and allow to cool to room temperature. Funnel into ketchup bottles or other tall container for easy serving.
    3. Note: You could use whole tomatoes and roughly chopped onions and puree the mixture with a hand blender in the pot.


    Thursday, July 19, 2012

    Our Summer Vacation: A Story in Numbers and Photographs

    8:54 PM 6 Comments

    Number of days we were gone: 31

    Number of miles traveled round trip: approximately 4100


    Number of states visited:   Illinois, Iowa, South Dakota, Wyoming, Montana, Colorado, New Mexico, Oklahoma, Kansas, Missouri = 10

    Number of places we've slept in the last 31 days: 9

    Number of car repair shops visited: 4

    Number of days spent at Grama and Grampa's house:  22

    Number of days Finn and Emmett spent loving on Grama and Grampa (and vice versa): 22

    Number of bears spotted in the woods: 1


    Number of wildfires watched from not very far away: 2


    Number of days on my fishing license: 2

    Number of fish I caught: 0

    Number of locations in which I attempted to catch fish: 3


    Number of rodeo spectators that volunteered for the "Ring of Fire": 6

    Number of rodeo spectators that lasted more than fifteen seconds when angry bull was released: 0


    Number of years that have passed since Sean and I got engaged in this exact spot: 10


    Number of relatives it takes to get the unheated pool up to 82 degrees: 10


    Number of kids that fit in Grampa's old Porsche: 6


    Number of miles Sean ran in Missoula on the 8th of July: 26.2


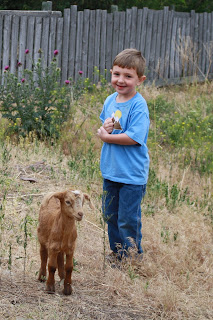
    Number of baby goats at the ranch: 5


    Number of years there has been a powwow in Arlee, Montana around the 4th of July: 121


    Number of chinchillas the kids got to feed in Fort Collins: 2


    Number of dear childhood friends who got married this past weekend in Salida, Colorado: 1


    Number of college friends visited in New Mexico: 2 + 2 daughters


    Number of times we ate carne adovada during our two days in New Mexico: 2


    Number of red chiles we brought back to Champaign so that we could make carne adovada: 21

    Number of minutes we spent in Oklahoma: 78

    Number of memories: countless

    It's good to be home but, wow, it was a great run. Thanks to the many friends and family along the way that welcomed us so warmly and made our summer so spectacular!