Showing posts with label snack. Show all posts

Monday, January 6, 2014

Homemade Pretzels / The Never-ending Winter Break

4:05 PM 0 Comments
Checking in from the frigid midwest, where the outside air temperature feels like -48 and a cup of boiling water vaporizes in mid-air when thrown out from the back porch. We were supposed to go back to school today - it's the end of winter break - but school was cancelled, and I just got the call that it is cancelled again for tomorrow. And while many of you out there are going cabin-fever-crazy, I am just plain giddy with happiness. I love being home with my boys.


Way back in my stay at home mom days, Finn and I got hooked on an obscure kids program called Hi-5. In a moment of apparent nostalgia, Finn requested it this morning, and I was all too happy to pull out the old DVDs. At some point during some episode there was a reference to soft pretzels, and I couldn't get it out of my head. And that's how Finn and I ended up making soft pretzels this chilly day. And, oh my goodness, if someone had told me years ago how easy it was to make AMAZING soft pretzels at home, I would have jumped on that bandwagon long ago.

So here you go. Whether you are stuck inside or just can't get the idea of a soft pretzel out of your head now, I hope you enjoy these as much as we did.
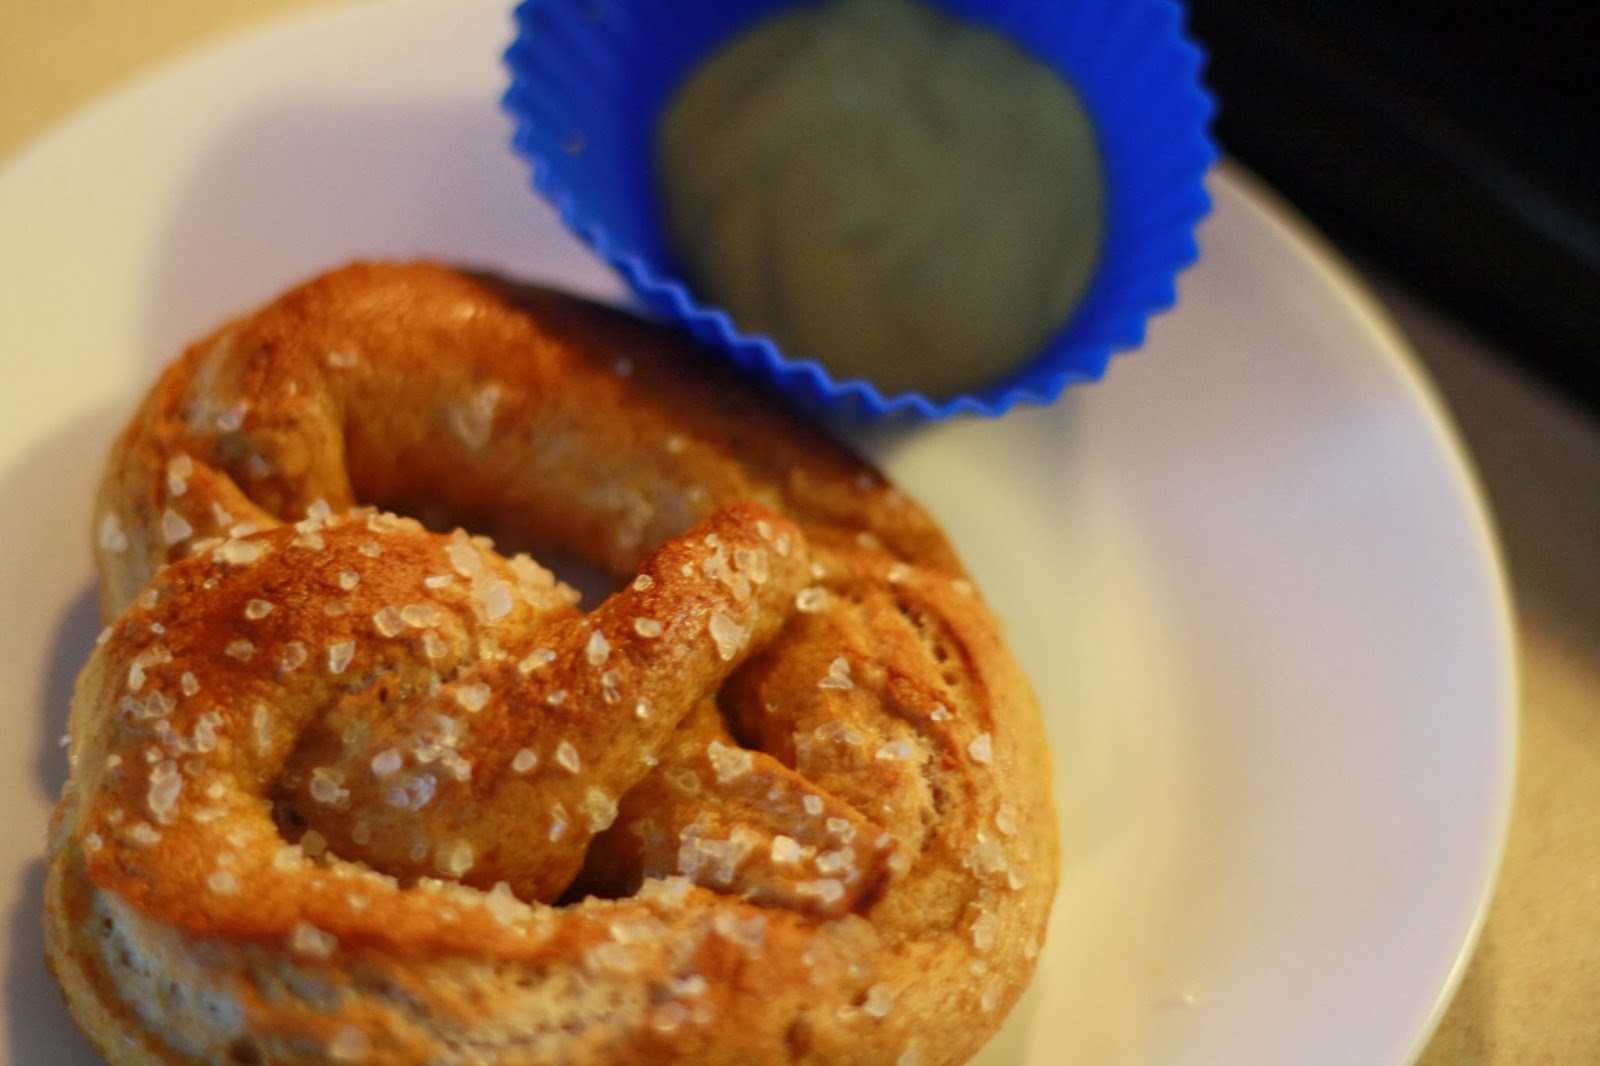


Homemade Pretzels
Adapted from Sally's Baking Addiction

Makes 10-12 large pretzels

PRINT ME!

1 1/2 cups lukewarm water
1 packet active yeast (2 1/5 tsp.)
1 tsp. salt
1 Tbsp. sugar
3-5 cups flour (I used half white, half whole wheat)
2/3 cup baking soda
1 large egg, beaten
coarse sea salt for sprinkling

  1. Preheat oven to 425 degrees. Line baking sheet with parchment paper or silicone baking mat. Set aside.
  2. In a large soup pot, bring 9 cups of water and 2/3 cup of baking soda to a boil.
  3. Dissolve yeast in warm water in bowl of stand mixer. Stir with a spoon until fairly mixed. Add salt and sugar. Stir until fairly combined. 
  4. Attach dough hook and turn mixer on low. Slowly add 3 cups of flour, 1 cup at a time. Mix on low until dough is thick. Add additional dough (up to one cup) until dough is no longer sticky.
  5. Turn up mixer and knead with dough hook for 3-5 minutes, until it forms a soft, supple ball.
  6. Turn the dough onto the counter. With a sharp knife, cut the dough into chunks, about 1/3 cup each (bigger than a golf ball, smaller than a tennis ball).
  7. Roll each chunk into a rope with an even diameter. Once you have a long rope, take the ends and twist them together, then bring them to the middle. Press firmly.
  8. Using a slotted spoon, dunk each pretzel, one by one, into the boiling water for 30 seconds. Transfer to a plate. Once cool enough to handle, dip into beaten egg (both sides). Place on baking sheet and sprinkle with salt. Repeat for each pretzel.
  9. Bake for 10 minutes at 425 degrees. Turn oven to broil and bake for 5 more minutes to brown the tops. Watch closely to avoid burning.
  10. Enjoy!


Thursday, July 18, 2013

No-Bake Energy Bites

1:19 PM 0 Comments
So a few weeks back, I attempted to make homemade breakfast bars with no success whatsoever. I really wanted to find a homemade alternative to processed snack bars - I find that when I am trying to eat healthily, I all too easily fall into the trap of purchasing granola bars and energy bars which - let's be honest - just aren't all that healthy and are far more expensive that the sum of their parts. I definitely have a sweet tooth, so while I appreciate the thousands of articles recommending that I snack on almonds or celery sticks, I need a little sugar to get me by, particularly in the afternoons.

I found this recipe referenced in a magazine that my husband's cousin Ami left at the house when we were in Helena. This is the perfect opportunity to give Ami a shout-out since she informed me that she checks my blog every morning for updates - how's that for loyalty? With deepest apologies for the long, silent weeks, Ami, I thank you for leaving behind that magazine which led me to this awesome recipe! You rock!

These are crazy good. You probably have everything you need to make them right now, so walk away from your computer and go do that. There is lots of information on substitutions, etc. on the original blog which is linked below. The only thing I changed from the original recipe is the amount of coconut - my first batch seemed a bit flaky, so I cut back.

Enjoy!


No-Bake Energy Bites
adapted from Smashed Peas and Carrots

PRINT ME!

1 cup oatmeal
1/2 cup peanut butter (or other nut butter)
1/3 cup honey
1/2 cup coconut flakes
1/2 cup ground flaxseed
1/2 cup mini chocolate chips
1 tsp vanilla

Mix everything above in a medium bowl until thoroughly incorporated.  Let chill in the refrigerator for half an hour.  Once chilled, roll into balls and enjoy!  Store in an airtight container and keep refrigerated for up to 1 week. (NOTE: They will not last one week. Guaranteed.)


Tuesday, July 16, 2013

Jiggity Jig

3:26 PM 0 Comments
We're home. Sigh. It was a lovely, lovely vacation, filled with family and friends and beauty and happy kids.


When it comes to food, two things happen on the flip side of a vacation: we come home with a renewed commitment to healthy eating (generally brought on by weeks of microbrewed beer consumption and an "I'm on vacation" mentality), and we always come home to a fridge so empty it takes a good week to get it back to snuff. We've been home three days now, and I've spent a fair amount of energy on the latter. There are a few things we just always like to have in the fridge: staples, like milk and bread and cheese and eggs, and homemade items, like yogurt. Since we also came home to a vegetable garden two feet taller than the vegetable garden we left, Finn and I spent a good portion of yesterday afternoon making pesto which found itself on whole wheat penne last night and will end up on a pizza later this week (while not a huge fan of packaged pizza dough, we're kind of crazy about the Pillsbury Artisan Whole Wheat Crust -- so good to have on hand!).

We ate a lot of hummus in Montana (I went to Costco for the very first time...wowzers!), but I really never tire of the stuff. It's great to have on hand when dinner isn't quite ready but the kids are already hungry. I liked the Costco stuff a lot (which is a good thing, since the container of it was ginormous), but I really like this easy recipe as well...it's super easy to throw together on a weekly basis. Feel free to add ingredients to your heart's content (olives, roasted red peppers, etc.) - I'm somewhat of a hummus purist, but you can easily customize this basic recipe.

Happy summer, all!

Quick Hummus

PRINT ME!

1 16 oz. can chickpeas
~1/4 cup liquid from the can
3 tbsp lemon juice
1 1/2 tbsp tahini
2 cloves garlic, minced
1/2 tsp salt
2 tbsp olive oil

Throw garlic cloves into the food processor and pulse to mince. Add the chickpeas, the lemon juice, the tahini, and the olive oil. Add a bit of the liquid from the can, then a bit more, until you reach the desired consistency. Once blended, add salt to taste.

The key ingredient here is the liquid from the can. I've tried lots of hummus recipes and could never get the texture quite right. This is super yummy, super economical, and super easy to throw together. Tahini is the only unusually ingredient; however, once you buy a jar to make this once, you'll have it on hand whenever you want to make more.

Sunday, September 30, 2012

Almost October Sunday

3:54 PM 0 Comments
Yesterday we made the obligatory visit to our local apple orchard to find out just "How Tall This Fall" our kids are, to take a wagon ride behind a big green tractor, and to stock up on apple cider donuts, a treat of which I honestly cannot get enough. Sadly, the U-Pick portion of the orchard was not available, but that didn't stop us from buying a peck of apples in the store that someone else picked.


I woke up this morning with applesauce on my mind. I used Stephanie O'Dea's crock pot recipe, in part because I didn't much feel like being tied to the house on this beautiful day. The only thing wrong with this recipe is that it just doesn't make enough - I tripled it, and I still only got about a quart of applesauce. Fortunately, it's easy enough to repeat as needed. I hope you enjoy it.

The rest of the apples went to a German Apple Pie, which we will enjoy on this eve of October. Finn and I made some seasonal decorations for the windows, and there are vegetables roasting in the oven for dinner. Oh fall, how I love thee.


Slow Cooker Applesauce
Adapted from crockpot365.com

4 large apples, peeled, cored and cut into quarters
1 tsp. lemon juice
1/2 tsp. cinnamon
1 tsp. vanilla
1 T. brown sugar
1/4 cup water

Place the quartered apples into the crock pot. Sprinkle with remaining ingredients. Cover and cook on low 4-6 hours. When the apples are super tender, mash with a potato masher or fork.

* Note: I tripled the recipe with no ill effect. I let mine cook the full 6 hours and then left it to cool for an hour before stirring it up.


Thursday, September 13, 2012

Baked Tofu

8:10 PM 5 Comments
My family can't get enough of this baked tofu; we snack on it after school, bring it for lunches, take it on picnics, stick it in sandwiches or in salads. The marinade is actually adapted from one that I found in a seafood cookbook and is intended for fish, but it works beautifully for this recipe. For my local readers, this reminds me a lot of the marinaded tofu at Strawberry Fields, which I have always loved, and, like their tofu, it works equally well straight up or on a sandwich. The flavor and texture deepen the longer that you bake it, and the resulting strips are positively addicting.

I use the really grainy, dense organic tofu that is available at our co-op, but this also works with standard grocery store fare. When I use the denser tofu, I don't think it is necessary to press it, but I always press the vacuum packed variety.

To make it a dinner, I cooked up some frozen shelled edamame and prepared soba noodles that I served cold with a noodle base (I like the Shirakiku Soba Noodle Soup Base, which I get at the Asian market). So pretty, so fresh, and so satisfying!

Enjoy!


Baked Tofu

PRINT ME!

For marinade:
3 cloves garlic, minced
3/4 cup soy sauce
1/2 cup brown sugar
1 tsp. ground ginger
1 tsp. lemon juice

1 16 oz block extra firm tofu

Drain and rinse the tofu. Place it on a plate and cover with paper towels. Put another plate on top then weigh it down with something heavy (I typically use a big ol' cookbook). Let sit ~20 minutes. You can skip this step if you are short on time.

Slice the tofu into 1/2 inch slices. Place in a shallow baking pan and cover with marinade. Let sit in marinade for 20-30 minutes, flipping every ten minutes or so. The longer it sits, the more flavorful the tofu will be.

Preheat the oven to 350 degrees. Temporarily transfer the tofu to a plate. Rinse and wipe out the baking pan and cover it with foil and cooking spray. Move the marinaded tofu slices bake onto the baking pan.  Bake the tofu slices for 30-40 minutes, flipping every ten minutes. The longer you bake it, the chewier it will be. This is good warm, cold, or at room temperature.


Saturday, April 28, 2012

Dessert Night: Strawberries on a Stick

3:34 PM 0 Comments
I can hardly call this a recipe; it's more the fortuitous result of having my kid remind me that it's dessert night (Friday) and looking in the fridge to see what I can come up with. I had a pint of strawberries and a batch of plain yogurt, among other things. Add in some brown sugar and you've got all you need for Strawberries on a Stick. Ready? Here goes.

Wash and hull a strawberry.

Stick a toothpick in the end.

Dip it in plain yogurt (sour cream also works).

Roll it in brown sugar.

Yum.


NOTE: Although the photo only shows one strawberry, you should by no means limit yourself to one. These are super yummy!